So, you’re ready to dive into the world of streaming and show off your skills, whether it’s owning the competition in Fortnite, speedrunning Minecraft, or just chatting with your growing community. But let’s be real: streaming isn’t just about hitting “go live” and hoping for the best. If you want to stand out in the ever-growing ocean of content creators, you’re going to need the perfect streaming kit. And yes, that means more than just a decent webcam and a Wi-Fi connection!
In this guide, we’re going to break down everything you need to set up a pro-level stream that’ll have people hitting that follow button. From the ultimate streaming PC setup to the gadgets that’ll make your stream look and sound incredible, we’ve got you covered. So, let’s get your streaming and gaming PC prepped and primed—because the world’s waiting to watch you shine!
Hardware Essentials: Build Your Streaming Kit Like a Pro
Alright, let’s talk gear. If you’re serious about streaming, you can’t just slap together any old tech and call it a day. Your streaming kit is the foundation of your whole operation, so making the right choices here is crucial. Whether you’re aiming to stream in glorious 1080p or want crystal-clear audio that won’t make your viewers cringe, you need the right hardware to get it done. Let’s break it down:
1. Powerful Streaming PC: Your MVP
Your PC is basically the brain of your streaming kit. You’ll need a rig that can handle running the latest games while streaming them without turning into a slideshow.
- Processor (CPU): Look for a multi-core beast like an Intel i7 or AMD Ryzen 7. Your CPU handles the heavy lifting when it comes to running your stream and the game simultaneously.
- Graphics Card (GPU): A strong GPU like an Nvidia RTX 3060 or AMD Radeon RX 6700 XT is essential if you want smooth gameplay and eye-popping visuals. Your viewers will thank you.
- RAM: At least 16GB of RAM is your sweet spot. You don’t want to get caught lagging during those epic moments.
Pro Tip: If your current setup is struggling, consider a dedicated streaming and gaming PC—one for gaming, the other for streaming. It’s a game-changer (literally).
2. Webcam: Look Sharp
Your viewers want to see your face, so don’t skimp on the webcam. A good cam can turn you from pixelated potato to high-def hero.

- Go-To Choices: The Logitech C922 Pro Stream and the Razer Kiyo are popular choices that give you 1080p at 60fps—perfect for making sure your reactions are on point.
- Pro Move: If you’re feeling fancy, you can even use a DSLR camera with a capture card for that extra cinematic feel.
3. Microphone: Sound Like a Pro
Nobody wants to listen to your stream if your voice sounds like you’re trapped in a tin can. A quality mic is a must-have for your streaming kit.

- USB or XLR: For beginners, USB mics like the Blue Yeti are great, but if you want studio-level sound, consider an XLR mic like the Shure SM7B (pro streamers swear by it).
- Mic Accessories: A pop filter and shock mount can make all the difference in sound quality, keeping those pesky P’s and B’s from blowing out your audio.
4. Capture Card: For Console Streamers
If you’re streaming from a console or running a dual-PC setup, a capture card is a must.
- Top Picks: Elgato HD60 S+ is the gold standard. It’s easy to use and gives you that 4K pass-through while streaming in 1080p.
With these pieces in place, you’re well on your way to building a killer streaming kit that’ll have your viewers glued to your stream.
Software Selection: Powering Your Streaming Kit
Now that your streaming kit is packed with the right hardware, it’s time to talk software. Without the right tools to manage your stream, all that fancy tech won’t do much. Let’s break down the top streaming software options that will have your stream looking professional, smooth, and—most importantly—totally you.
1. OBS Studio: The Free Powerhouse
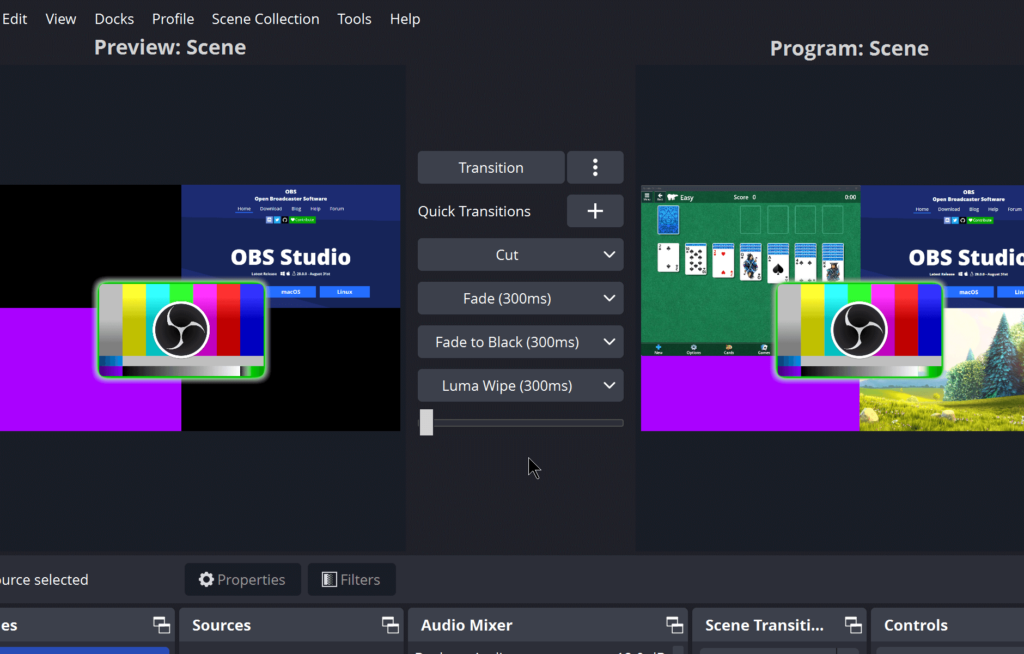
OBS Studio is like the Swiss Army knife of streaming software—it’s free, open-source, and insanely flexible. Whether you’re just starting or have been in the game for a while, OBS gives you all the tools you need to craft a top-tier stream.
- Customization: OBS is super customizable, allowing you to create custom layouts, add plugins, and tweak settings to your heart’s content.
- Stream Scenes: Set up different scenes for gaming, chatting, or even that “be right back” screen—switching between them is smooth as butter.
- Performance: Because it’s lightweight, OBS won’t hog all the resources on your streaming PC, leaving more power for your games.
2. Streamlabs: The Beginner’s Best Friend
If you’re looking for something a little more beginner-friendly but still packed with features, Streamlabs is a solid choice. It’s built on OBS, but with a cleaner interface and extra tools baked right in.
- All-in-One Dashboard: Streamlabs integrates alerts, donations, and other stream interactions directly, making it easier to engage with your audience without juggling multiple programs.
- Pre-Made Themes: Not a graphic designer? No worries—Streamlabs has tons of pre-made themes and overlays to make your stream look slick right from the start.
- Monetization: Built-in tools for viewer donations and merch make it easier to start earning from your streams right out of the gate.
Fun Fact: Streamlabs also has a mobile version, so if you’re feeling adventurous, you can stream IRL directly from your phone!
3. XSplit: For the Pros Who Want It All
XSplit is a premium option, and if you’re serious about streaming with all the bells and whistles, it’s worth a look. It’s not free, but you get what you pay for with a range of pro features.
- Built-In Editing Tools: XSplit lets you edit and manage your stream content on the fly, which is perfect for when you need to make quick adjustments.
- Advanced Features: XSplit has integrations with tons of third-party apps, letting you do everything from managing chats to applying real-time video effects.
- Support: Paying for XSplit comes with perks, like professional support and exclusive updates.
Pro Tip: If you want a no-hassle experience with a polished interface, XSplit’s a solid investment. Just make sure your streaming PC can handle the extra load.
4. Bonus Tools: Extras to Up Your Game
- Voicemeeter: Perfect for audio nerds who want total control over their stream’s sound, letting you balance game audio, voice, and even music.
- Touch Portal: Use your phone as a stream deck to control scenes and alerts on the fly like a true pro.
With the right software, your streaming kit is about to go from good to unstoppable. Now that your stream looks and runs smoothly, let’s make sure your voice sounds as crystal-clear as your gameplay!
Audio Setup: Crystal-Clear Sound for Your Streaming Kit
Now that your stream looks amazing, let’s make sure it sounds just as good. Audio quality is crucial—nobody wants to stick around if they can’t hear you properly or if there’s a constant background hum. Your streaming kit isn’t complete without a solid audio setup, so here’s how to get that studio-quality sound that’ll keep your viewers hooked.
1. Microphone Placement: Getting the Best Sound
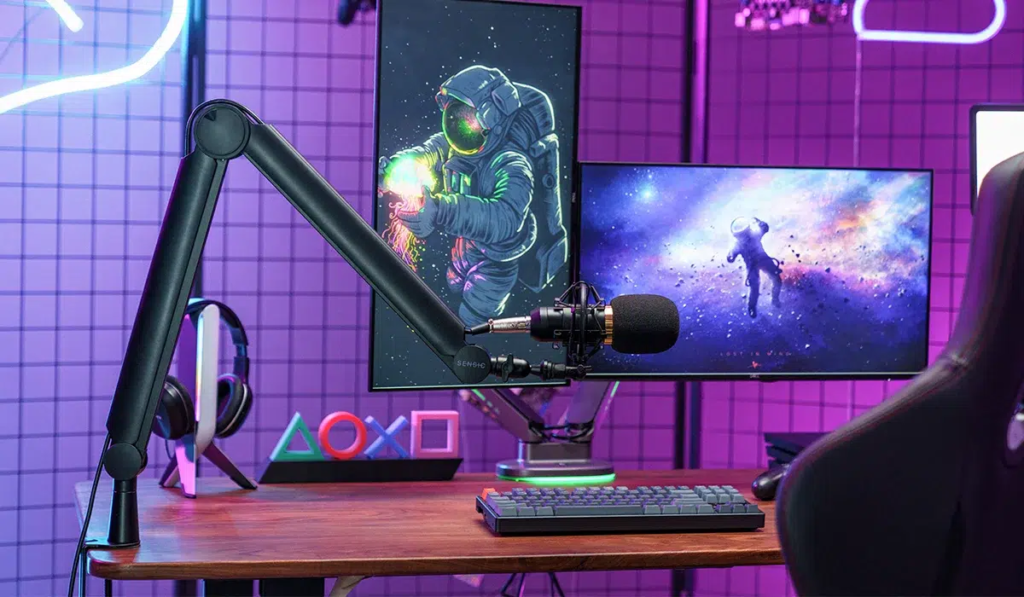
Your mic is your voice to the world, so placing it right is key. Too far, and you’ll sound distant; too close, and you might blow out your audience’s eardrums with every excited yell.
- Ideal Distance: Keep your mic about 6-12 inches away from your mouth. This helps capture your voice clearly while avoiding distortion.
- Angle It Right: Point the mic at your mouth but slightly off to the side—this helps reduce those harsh “P” and “B” sounds.
Pro Tip: Add a pop filter or windscreen to block out harsh sounds and improve clarity. It’s a cheap, easy way to level up your audio quality.
2. Noise Reduction Techniques: Silence the Chaos
Streaming from home means background noise is inevitable. Whether it’s your noisy keyboard or a barking dog, there are ways to cut out the distractions and keep your audio clean.
- Software Filters: OBS Studio and Streamlabs both offer noise reduction filters that can help minimize unwanted background noise. Tools like NVIDIA RTX Voice can even cut out sounds like typing or fan noise in real-time.
- Mic Isolation: If you’re in a noisy environment, consider adding a shock mount or mic arm to your streaming kit. These reduce vibrations from things like typing or bumping your desk.
Pro Tip: Set up a noise gate to cut out low-level noise when you’re not speaking. This makes your stream audio cleaner and more professional.
3. Audio Software: Fine-Tuning Your Sound
While hardware does most of the heavy lifting, using the right software will give your audio that extra polish. Here’s how to step up your game:
- Voicemeeter Banana: This software lets you control and mix your audio sources like a pro. Balance your microphone, in-game audio, and music all from one interface.
- ReaPlugs (for OBS): These plugins are fantastic for adding compression and equalization, giving your voice more depth and making sure it’s not too quiet or too loud.
Pro Tip: Use a compressor to level out the highs and lows in your voice, ensuring that loud moments don’t blow out your viewers’ ears, and quiet moments are still clear.
Video Quality: Sharpen Up Your Stream
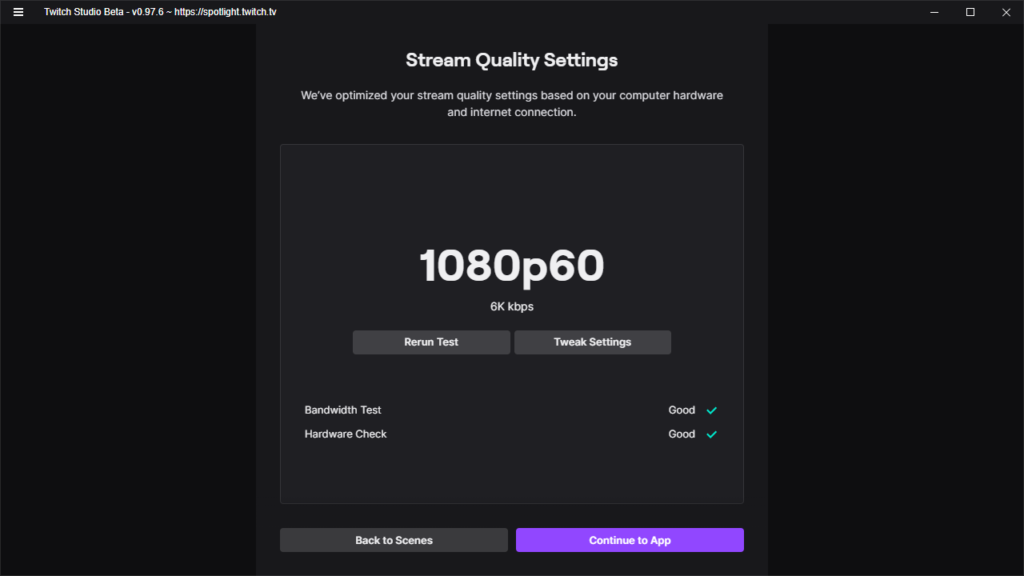
You’ve got the sound dialed in, but what about the visuals? If your video quality looks like it’s from the early 2000s, your viewers might not stick around to see your epic gaming moments or engage in your chats. Let’s get your streaming kit set up to deliver sharp, buttery-smooth video that’ll have your stream looking like a professional broadcast.
1. Resolution: The Clearer, The Better
Your stream’s resolution is the first thing viewers will notice. Crisp visuals keep people engaged, so getting the right balance between quality and performance is key.
- 1080p at 60fps: The gold standard for streamers. This resolution and frame rate combo gives you a smooth, high-quality stream. Just make sure your streaming PC can handle it!
- 720p at 60fps: If your internet or hardware struggles with 1080p, drop down to 720p. It still looks good and takes less bandwidth.
2. Frame Rate: Smooth Is the Move
Frame rate is all about smoothness. A higher frame rate will give your stream that ultra-fluid motion, especially when you’re gaming.
- 60fps: Ideal for most games and what most viewers expect nowadays. It ensures fast-paced action is smooth and easy on the eyes.
- 30fps: If you’re streaming a more relaxed game or you’re having bandwidth issues, 30fps can still get the job done without sacrificing too much quality.
3. Bitrate: Balancing Quality and Bandwidth
Bitrate determines how much data you’re sending to the streaming platform every second, directly affecting video quality. But beware—set it too high, and viewers with slower connections might experience buffering. Too low, and your stream will look pixelated.
- 1080p at 60fps: Aim for a bitrate between 4,500 and 6,000 kbps for high-quality streams.
- 720p at 60fps: You can drop this down to 3,000-4,000 kbps without sacrificing too much clarity.
Pro Tip: Make sure your internet upload speed is up to the task! For 1080p 60fps, you’ll need an upload speed of at least 6 Mbps. Run a speed test to see where you stand.
4. Lighting: Don’t Stream in the Dark
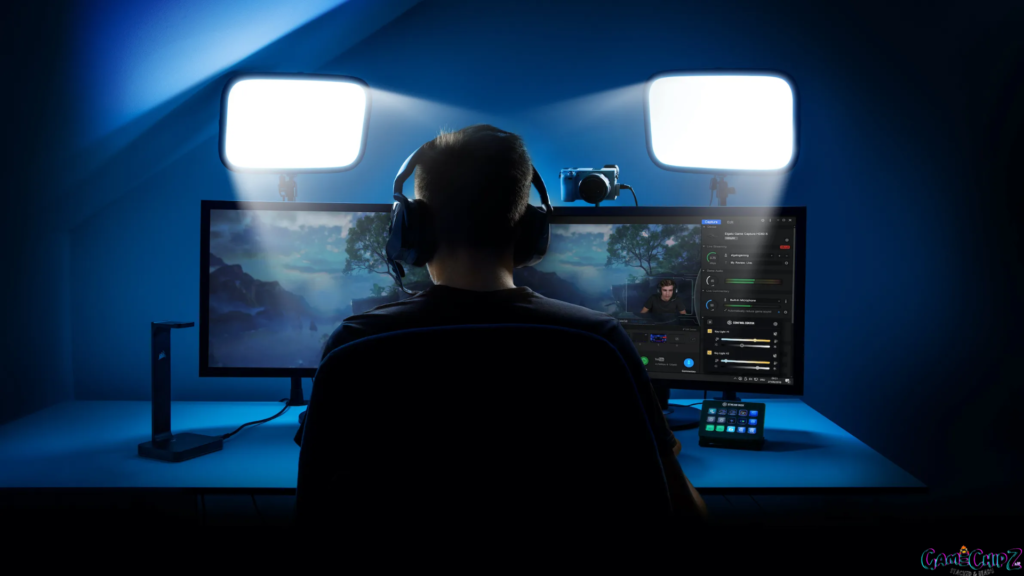
Even with a great webcam, bad lighting can tank your video quality. A simple lighting setup can make a world of difference.
- Ring Lights: These are super popular among streamers. They provide soft, even lighting that’ll make you look great on camera.
- Softboxes: If you want to go pro, softbox lights are a more advanced option that give you total control over lighting angles and brightness.
Pro Tip: Natural light can be your best friend! Stream during daylight hours if possible, but make sure you’re not sitting directly in front of a window—you’ll end up backlit and shadowy.
5. Green Screen: Add Some Magic
Want to give your stream a sleek, immersive look? Consider adding a green screen to your streaming kit. This allows you to remove your background entirely, so you can put yourself directly in the game or a custom scene.
- Elgato Green Screen: Easy to set up and store, this is a top choice for streamers who want to clean up their visuals.
- DIY Option: You can also create a green screen setup with any solid green cloth—just make sure it’s evenly lit to avoid weird shadows.
Network Optimization: Keep Your Stream Running Smoothly
Now that your streaming kit has the perfect mix of hardware and software, let’s make sure your stream doesn’t turn into a pixelated, laggy mess. A strong internet connection is the backbone of your stream—no one wants to watch a stream that’s constantly buffering or cutting out. Here’s how to optimize your network for smooth, uninterrupted streaming.
1. Check Your Upload Speed: The Streamer’s Lifeline
Your upload speed is critical for maintaining a high-quality stream. While download speed is important for gaming, upload speed is what dictates how well your stream gets out to the world.
- Minimum Upload Speed: For a solid 1080p at 60fps stream, aim for at least 6-8 Mbps of upload speed. You can stream at 720p with as little as 3-4 Mbps, but why not go for the best quality you can?
- Speed Test: Run an internet speed test before you stream to make sure you have enough bandwidth. Sites like speedtest.net are great for this.
Pro Tip: If your connection is unstable, lower your resolution or bitrate. This will reduce strain on your network and keep your stream smooth.
2. Go Wired: Ditch the Wi-Fi
Sure, Wi-Fi is convenient, but it’s also prone to interference and drops. For a steady, reliable connection, nothing beats a wired Ethernet connection.
- Ethernet Cable: Plugging your streaming PC directly into your router will give you a more consistent connection, reducing the risk of lag or random disconnects.
- Wi-Fi Back-Up: If going wired isn’t an option, try to stream as close to your router as possible, and invest in a high-quality router to reduce interference.
3. Optimize Your Router Settings: Streamline Your Connection
Most people don’t realize that their router can be optimized for streaming. A few tweaks here and there can make a huge difference in your stream’s performance.
- Quality of Service (QoS): Many routers have a QoS feature, which allows you to prioritize certain devices (like your streaming and gaming PC) for bandwidth. This ensures your stream gets the lion’s share of your network’s power.
- Dual-Band Router: If you’re sharing the network with roommates or family, a dual-band router can help. You can put your streaming PC on one band and leave other devices (like phones and smart TVs) on the other.
Pro Tip: If your router is outdated, upgrading to a more powerful model can vastly improve your connection. Look for routers specifically designed for gaming and streaming.
4. Monitor Your Bandwidth: Keep Things Smooth
Streaming uses up a lot of bandwidth, so if you’ve got multiple devices streaming Netflix, gaming, or downloading files, it can hog your connection and cause buffering.
- Bandwidth Hoggers: Ask anyone sharing your connection to avoid heavy internet use while you’re streaming, or schedule your stream during quieter times.
- Limit Background Apps: Close any unnecessary apps or background tasks on your streaming PC that could be eating up bandwidth. Even auto-updates can affect your stream quality.
5. Streaming Platforms: Know Your Limits
Different platforms have different requirements, so make sure you’re familiar with the best settings for the platform you’re streaming on.
- Twitch: Twitch recommends 1080p at 60fps with a bitrate between 4,500 and 6,000 kbps for optimal streaming.
- YouTube: YouTube is a little more flexible and supports up to 4K streaming, but keep in mind it’ll need much more bandwidth.
- Facebook Gaming: If you’re streaming here, the platform is more forgiving with bitrates, but stick to around 3,000-6,000 kbps for the best results.
Final Steps: Ready, Set, Stream!
With everything in place, it’s time to go live. Begin by conducting a final test to ensure all components are working smoothly. Check your audio for clarity, confirm your video feed is set up correctly, and make sure alerts and overlays are functioning as expected.
Next, set up your stream with a compelling title, relevant tags, and the correct category to maximize discoverability. Promote your stream through social media and Discord to attract viewers, and maintain a consistent schedule to build a loyal audience.
Engage with your viewers by greeting them, asking questions to keep the chat lively, and responding to comments to make them feel valued. With these steps, you’re ready to hit “Go Live” and make the most of your top-notch streaming kit. Enjoy connecting with your audience and delivering a great streaming experience!

